
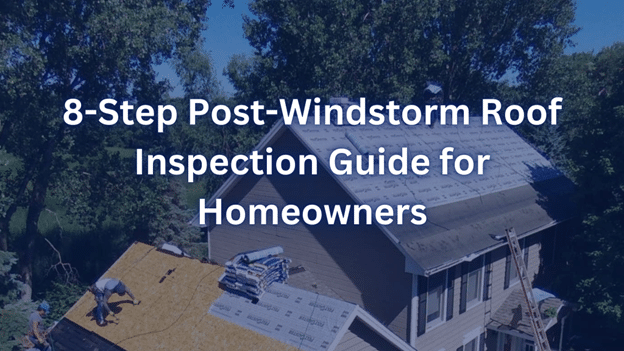
Post-Windstorm Roof Inspection: A Step-by-Step Homeowner Guide
After a New Mexico windstorm, your roof may look fine from the ground, but hidden damage often starts long before visible signs appear.
High winds, heavy rain, hail, and flying debris can loosen shingles, open small gaps, or cause water intrusion that shows up days later as water stains on ceilings, walls, or insulation. That is why a structured post-windstorm roof inspection checklist matters.
This guide gives homeowners a step-by-step approach to a safe post-storm roof inspection, from the ground level to the attic, including safety notes, how to provide documentation for insurance claims, and when to call a professional roofing contractor.
Step 1: Document the Storm and Property Perimeter
Start your inspection by establishing the context of the storm. Walk around your house and take photos of anything the wind may have affected. Capture fallen branches, fence damage, patio disturbances, or items moved by wind or rain. Photograph storm damage on the windward side and any early visible damage, such as missing shingles, damaged shingles, or displaced outdoor items.
Note the date, approximate time, and any known wind direction. This becomes important for insurance purposes, especially if you plan to file a claim for roof damage, hail damage, or other impacts.
One wide photo that includes your mailbox or house number is recommended so adjusters can verify that the documentation belongs to your property.
For additional safety and recovery guidance after severe weather, you can visit Ready.gov for an easy-to-follow guide.
Step 2: Ground-Level Roof Scan (Binoculars or Phone Zoom)
From the ground, visually scan your roof for visible signs of problems. Begin with the windward slopes exposed during the storm. Look for damaged shingles, missing shingles, creased tabs, bent ridge caps, or areas where shingle granules have worn away.
Check for any obvious damage created by debris, such as branches or blown objects.
For metal roofs, look for dents at rakes and ridges, loose trim, or backed-out fasteners. If you can see TPO or low-slope areas from the ground, look for standing water, membrane flutter, or blocked drains. These may require professional help.
To understand why seals matter for shingles, the IBHS guide is a helpful resource in explaining how wind interacts with the shingle’s sealant line and why lifted or creased tabs often signal true wind-related movement rather than aging. It also provides clear visuals that can help homeowners compare what they see on their own roof after a storm.
Step 3: Gutters, Downspouts, and Splash Areas
Next, inspect your gutters and downspouts. Storms can wreak havoc on drainage systems, leaving behind clogged gutters, blocked drains, or dented elbows. Look for piles of shingle granules beneath downspouts. A large buildup immediately after a post storm roof event can signal abrasion or roof surface loss.
Confirm that downspouts are still attached and directing water away from the foundation. If you notice loose hangers or separated seams, take photos. These can indicate that wind pushed water backward or caused movement during the storm.
Step 4: Soft Metals and Siding Clues
Soft metals often reveal the direction and intensity of storms. Look closely at vents, chimney caps, flashing, drip edge, and fascia. Small dents or scratches often confirm that high winds or debris struck the roof.
Capture close-ups of missing flashing, loose fasteners, and displaced edge metal.
Check siding at roof-to-wall intersections and verify that kickout flashing is still in place.
Misaligned flashing can allow water leaks behind walls and cause long-term issues. For effective photo documentation, FEMA provides a helpful step-by-step guide
Step 5: Slope-Specific Checks (Shingle, Metal, TPO)
Shingle Roofs (Asphalt)
Look for damaged shingles, creased tabs, tears, exposed asphalt, or missing pieces on your shingle roof. These are common after high winds or heavy rain.
Distinguish aging from wind by noting the pattern. Uniform fade usually indicates wear, while linear creases or lifted edges indicate wind uplift.
Metal Roofs
Check for denting at ribs, loose ridge caps, fastener back-out, and panel shifting at eaves. Widespread dents plus loosened seams may require a roofing contractor to determine whether the roof’s integrity is affected.
TPO and Low-Slope Roofs
Inspect your TPO roof for membrane flutter, wrinkles at parapets, seam stress, or standing water. Note ponding near drains or scuppers.
Low-slope roofs are especially vulnerable to hidden moisture, compromised decking, or water intrusion, so regular inspections help prevent further damage.
Step 6: Penetrations and Flashing Points
Penetrations are the most common source of water leaks after a storm. Check around plumbing stacks, pipe boots, chimneys, satellite dishes, vents, and skylights.
Look for split rubber boots, lifted or missing flashing, storm collar displacement, or fresh sealant tears. Photograph each spot with one medium shot and one close-up so you can show both context and detail.
If you suspect water has entered around these areas, note any water stains or interior cracks below the penetration.
Step 7: Attic and Interior Verification
Gently access your attic with a flashlight. Look for new stains, damp insulation, hidden moisture, musty odors, or visible signs of daylight entering through edges or ridge areas.
During the next rainfall, recheck for active leaks. Document locations carefully by noting which room is below the stain. This helps a roofing contractor locate the problem during repairs.
For homeowners beginning cleanup after a storm, the CDC Natural Disaster Guide offers clear guidance on protective gear, safe debris handling, and how to reduce health risks during recovery.
Step 8: Photo and Video Checklist (What to Capture)
A complete photo set helps roofing contractors and insurance adjusters understand the full scope of storm damage. Make sure your photos are time-stamped.
- Wide shots: front, back, and each slope
- Medium shots: rakes, eaves, valleys, ridges, flashing
- Close-ups: damaged shingles, lifted edges, torn sealant, punctures, dents
- Attic: damp insulation, daylight gaps, water stains
- Context: fallen branches, dented gutters, siding damage
This documentation helps protect your home and streamline insurance claims.
What Merits a Service Call (Repair Thresholds)
Contact a professional roofing contractor if you notice:
- Several creased or lifted shingles
- Missing shingles or displaced ridge caps
- Loose or missing flashing
- Fresh attic stains or musty odors within 24 to 48 hours
- Metal roof issues, such as fastener back-out or seam gaps
- TPO issues like seam stress, torn scupper strainers, or persistent ponding
Before your contractor arrives, gather:
- Your address and access notes
- Photos and documentation
- Information about active leaks
- Preferred contact window
East Mountain Roofing offers free inspections and estimates and specializes in shingle, metal, and TPO roofs throughout New Mexico.

Schedule a Post-Storm Roof Inspection in New Mexico
If you are unsure what the storm may have left behind, a roof inspection is an easy way to get clear answers. It helps you confirm whether you are dealing with storm damage, early water intrusion, or normal wear before these issues grow into bigger problems.
East Mountain Roofing provides free inspections and written findings for homeowners in Albuquerque, Santa Fe, Rio Rancho, Edgewood, Sandia Park, Cedar Crest, Moriarty, Placitas, Belen, and Corrales, usually within 24 to 48 hours. We are here to make the next steps simple and stress-free.
If you need a closer look after a windstorm, our team is ready to help. Call (505) 264-7081, Monday through Friday, to schedule an inspection.