
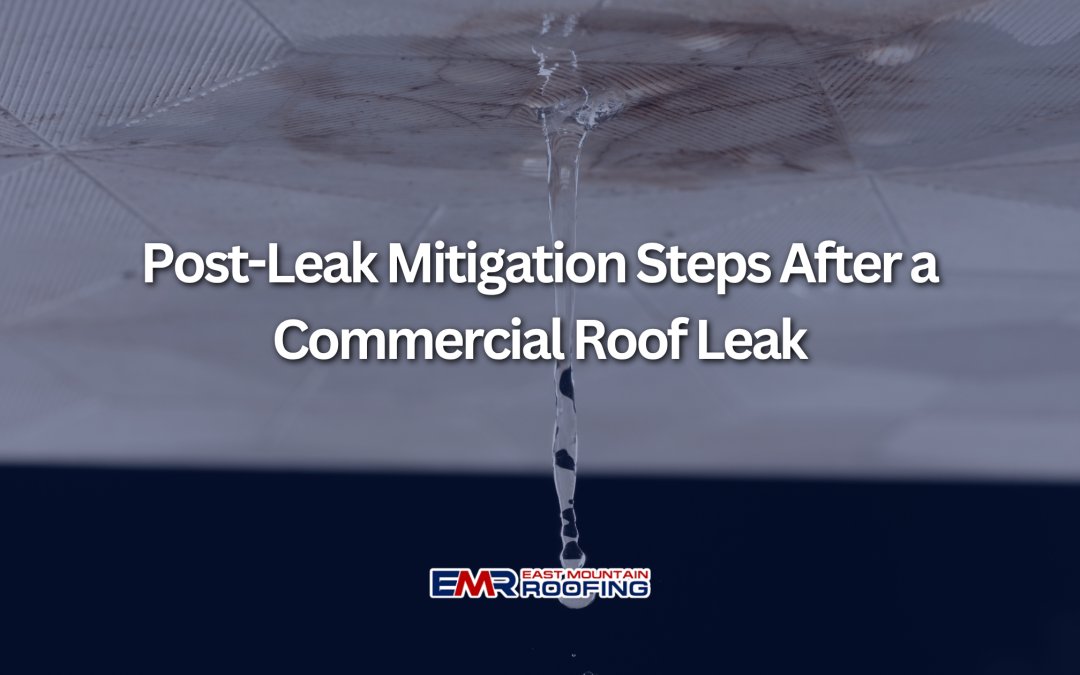
After a Commercial Roof Leak: Post-Leak Mitigation Steps to Reduce Damage and Downtime
A commercial roof leak can disrupt operations quickly, damaging equipment, inventory, ceilings, and electrical systems while forcing parts of a building offline. For facility managers and property owners, knowing what to do immediately after discovering a water leak can significantly reduce water damage, safety risks, and business downtime.
Acting quickly helps minimize damage, prevent mold growth, and protect structural integrity. When leaks appear, responding quickly and working with experienced roofing professionals can make all the difference in protecting building operations and avoiding costly repairs.
This guide outlines practical post-leak mitigation steps for commercial roofs, from immediate safety precautions to temporary containment and the water mitigation process that follows.
Step 1: Ensure Safety in Affected Areas Before Starting the Mitigation Process
The first priority after discovering roof leaks is to ensure safety for employees, tenants, and visitors. Water leaking through ceilings can mix with electrical wiring, lighting, or equipment, creating a dangerous mix that increases health risks.
Block access to affected areas immediately and shut down nearby electrical circuits if necessary. Wet ceiling tiles and damaged materials may collapse unexpectedly, especially when excess water accumulates above suspended ceilings.
In some cases, leaks may originate from other sources, such as a burst pipe, faulty supply lines, or equipment like a washing machine connected to the building’s water supply. If plumbing is suspected, maintenance teams may need to locate the main water shutoff valve to stop additional water flow.
During any water emergency, workers should use protective gear and avoid areas where contaminated water may be present.
Step 2: Contain the Water Leak and Protect Interior Assets
Once safety is established, the next step in the mitigation process is stopping the spread of water intrusion and protecting property.
Water entering through roof penetrations or seams can quickly travel into hidden areas and across ceilings before reaching the floor. Acting quickly helps minimize damage to equipment, flooring, and building contents.
Key containment actions include:
- Place buckets or containers to collect standing water
- Cover sensitive equipment with plastic to prevent further damage
- Move materials away from the leak to reduce the materials affected
- Remove soaked ceiling tiles and other damaged materials
- Stop water movement and slow the water flow where possible
These actions help prevent excess moisture from spreading to other rooms and reduce the risk of structural damage.
If the leak continues, professional help may be required for commercial roof leak repair. East Mountain Roofing can inspect the roofing system, identify the source of the problem, and provide the right repair solution to stop water intrusion and prevent further damage to your building.
Step 3: Document the Damage for Insurance Claims and Damage Assessment
Thorough documentation is critical before the full water damage restoration process begins. Facility managers should document the damage immediately so the insurance company and insurance adjuster can review the extent of the loss.
Take clear photos and videos of all affected areas, including ceilings, insulation, equipment, and flooring. Capture both wide views and close-up images of damage to ensure a complete damage assessment.
Important information to record includes:
- The time the leak was discovered
- Visible water intrusion and hidden water signs
- Areas where excess moisture is present
- Damaged equipment, hardwood floors, or structural components
- Steps taken to reduce damage and restore the building to pre-loss condition
Documentation supports insurance claims and helps restoration specialists create a proper restoration plan.
Ready, the official U.S. emergency preparedness website, recommends documenting property damage thoroughly after building emergencies to support claims and recovery efforts.
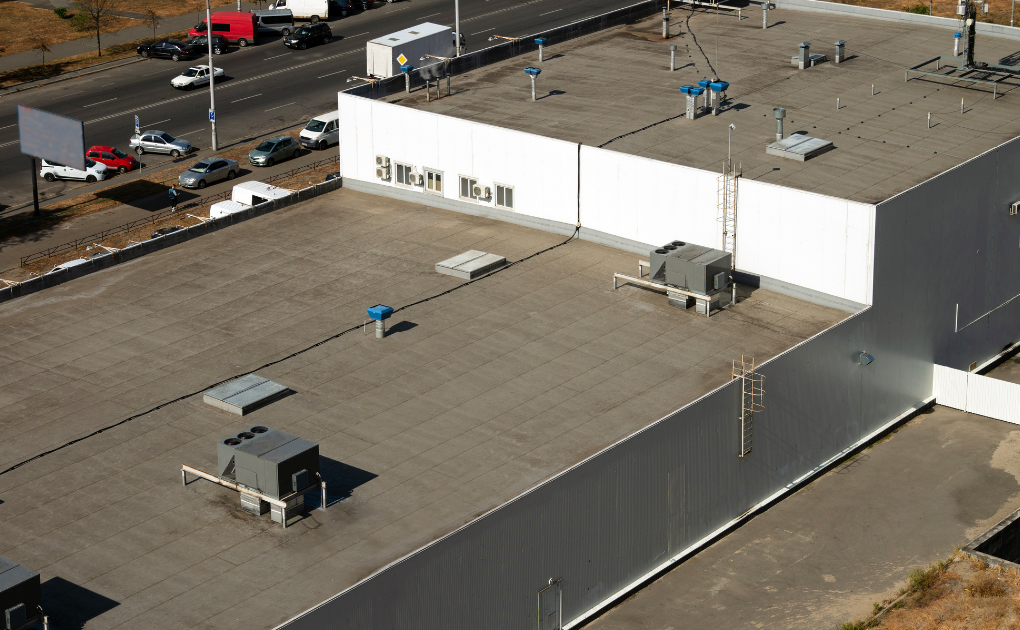
Step 4: Identify the Source of the Leak Through Initial Assessment
Finding the source of the leak is a key step in preventing ongoing water damage. However, water entering through commercial roofs may travel long distances before appearing indoors.
During the initial assessment, building managers may notice leaks near HVAC equipment, roof seams, or drainage areas. These inspections should be conducted safely without walking on the roof during severe weather.
Professional inspectors often perform an initial inspection using advanced moisture detection tools such as thermal imaging and moisture meters. These technologies detect hidden moisture trapped behind walls, insulation, or roofing membranes.
Taking moisture readings helps identify hidden areas where water has spread and prevents unnoticed damage to structural components. According to the U.S. Environmental Protection Agency, moisture that remains hidden in building materials can quickly lead to mold problems if not detected and addressed early.
Early detection helps prevent mold spores, structural issues, and indoor air contamination.
Step 5: Temporary Dry-In Measures and Water Mitigation
After locating the leak, temporary repairs can slow or stop water entry until permanent repairs are completed.
These measures are part of water mitigation, which focuses on controlling damage before full restoration begins. Temporary repairs may include tarping the roof, sealing punctures, and clearing drains.
Additional mitigation steps include:
- Removing standing water through water removal or water extraction
- Using wet vacuums and commercial-grade equipment
- Deploying air movers to accelerate the drying process
- Ensuring proper ventilation to remove excess moisture
This stage of the water mitigation process helps prevent mold growth and protect the building’s structural integrity.
In some cases, porous materials such as insulation, drywall, or ceiling tiles must be removed or discarded porous materials that cannot be salvaged.
These steps help support mold prevention, protect indoor environments, and reduce the risk of costly repairs later.
Step 6: Schedule a Professional Commercial Roof Inspection
Temporary containment does not solve the underlying roofing issue. A professional inspection is needed to determine the true cause of the leak and develop a long-term solution.
Roofing contractors perform a full damage assessment to inspect seams, flashing, drains, and roof penetrations. They also evaluate areas where HVAC systems or rooftop equipment interact with the roofing membrane.
Professional inspections often include:
- Detailed moisture detection and moisture readings
- Identifying materials involved in the leak
- Evaluating potential structural damage
- Checking for hidden water beneath roofing layers
A qualified water restoration company or roofing contractor may also work alongside a certified restoration team when leaks cause significant interior damage.
Experienced restoration professionals and restoration crews use specialized equipment and follow strict restoration certification standards when managing large-scale water emergencies.
East Mountain Roofing offers inspections and estimates to identify roof problems quickly and restore safe conditions for commercial properties.
Step 7: Plan Permanent Repairs to Prevent Further Damage
Once the cause of the leak is identified, a permanent repair plan can be created to restore the roof and prevent future problems.
Roof repairs may involve patching membranes, replacing flashing, correcting drainage problems, or replacing severely damaged materials. These repairs restore the building’s structural integrity and prevent future water intrusion.
In more serious cases, repairs may include replacing damaged materials or restoring sections of insulation and decking.
Permanent repairs help eliminate moisture sources that lead to mold growth, protect indoor environments, and prevent expensive structural repairs.
Emergency Commercial Roof Leak Response in Central New Mexico
Commercial buildings such as churches, warehouses, offices, and retail spaces depend on reliable roofing systems to protect operations and assets.
When leaks occur, rapid response helps minimize damage, prevent mold spores from spreading, and reduce business downtime.
Professional roofing teams may provide immediate assistance during severe leaks to stabilize the situation and begin the water cleanup and restoration process.
Fast response helps:
- Protect equipment and HVAC systems
- Prevent excess moisture from spreading
- Reduce structural damage
- Lower overall restoration costs
East Mountain Roofing provides inspections and commercial roof repair services across Central New Mexico, helping property owners address roof problems quickly and effectively.
Reduce Damage and Downtime With Fast Commercial Roof Leak Response
When a commercial roof leak occurs, the steps taken in the first few hours can determine how much damage your building suffers. Prioritizing safety, containing the leak, documenting the issue, and arranging a professional inspection all help minimize disruption and repair costs.
Temporary mitigation measures help stabilize conditions by removing excess water, controlling moisture, and supporting the drying process. However, permanent repairs and professional roofing evaluation are essential to protect the building long-term.
If your facility is experiencing a leak, early action can prevent further damage and reduce restoration expenses. Contact East Mountain Roofing at (505) 264-7081 to schedule a free inspection and estimate, or fill out the contact form on our website to request service and restore the protection your commercial roof is designed to provide.